 Filter Sets
The “Filter sets” step is one of the optional components and controls various output parameters. In our example, a filter will be created that only shows entries with “Published” activated for the frontend output.
To access the filters, activate the MetaModels overview again so that the “Employee List” entry
is visible. Then click the icon “ Filters” and the view switches to the filters
overview — which is currently still empty.
Filters” and the view switches to the filters
overview — which is currently still empty.
After clicking “ New”, the mask for creating a filter opens immediately. Only a name
for the filter is entered in the “Name” input field — e.g. “Published” (see screenshot).
New”, the mask for creating a filter opens immediately. Only a name
for the filter is entered in the “Name” input field — e.g. “Published” (see screenshot).

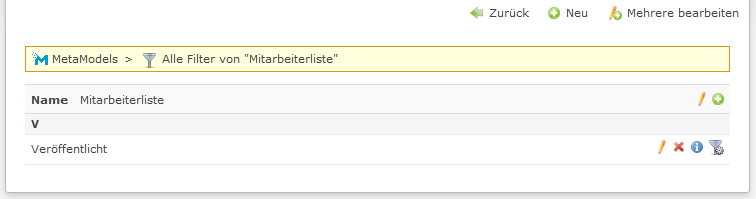
The filters overview should now show the first entry “Published” — see screenshot.
Clicking the icon “ Attributes” opens the next level for the filter
attributes. Here, the filter is configured with its filter attributes. The filter attributes can
be linked together in various combinations and nesting. For the example, only one filter
attribute is added to the filter by clicking the “ New” icon in the header.
Attributes” opens the next level for the filter
attributes. Here, the filter is configured with its filter attributes. The filter attributes can
be linked together in various combinations and nesting. For the example, only one filter
attribute is added to the filter by clicking the “ New” icon in the header.
After clicking, only the clipboard icon  is initially visible — clicking the icon
opens the configuration mask.
is initially visible — clicking the icon
opens the configuration mask.
For filtering the published status, there is a special filter under “Type” that is selected. As the attribute, “Published” is selected (see screenshot).
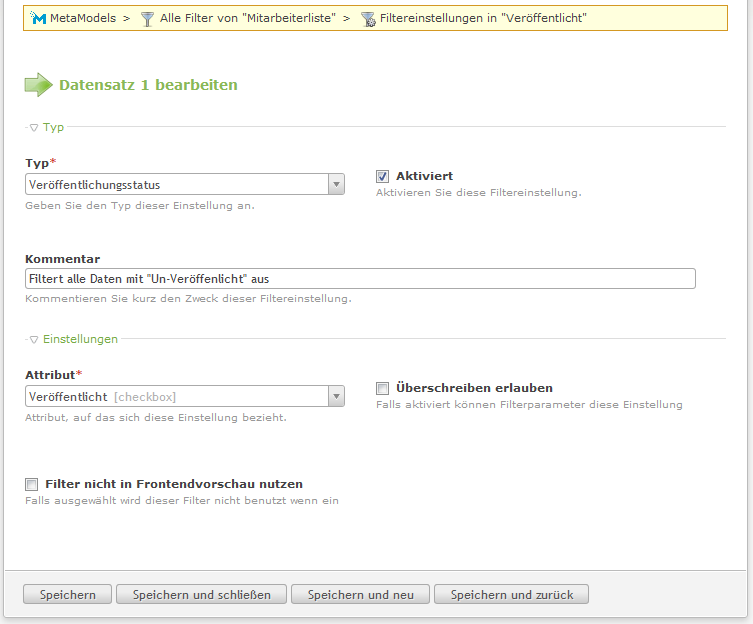
After clicking “Activated” and “Save and close”, the filter attribute is complete and the following list view should be visible (see screenshot).

The filter is now defined and can be activated in various components.