 Input Masks
In this step, the input mask for the MetaModel “Employee List” is created, through which the attribute data is stored in the database.
To access the input masks, activate the MetaModels overview again so that the “Employee List”
entry is visible. Then click the icon “ Input masks” and the view switches to the input
masks overview — which is currently still empty.
Input masks” and the view switches to the input
masks overview — which is currently still empty.
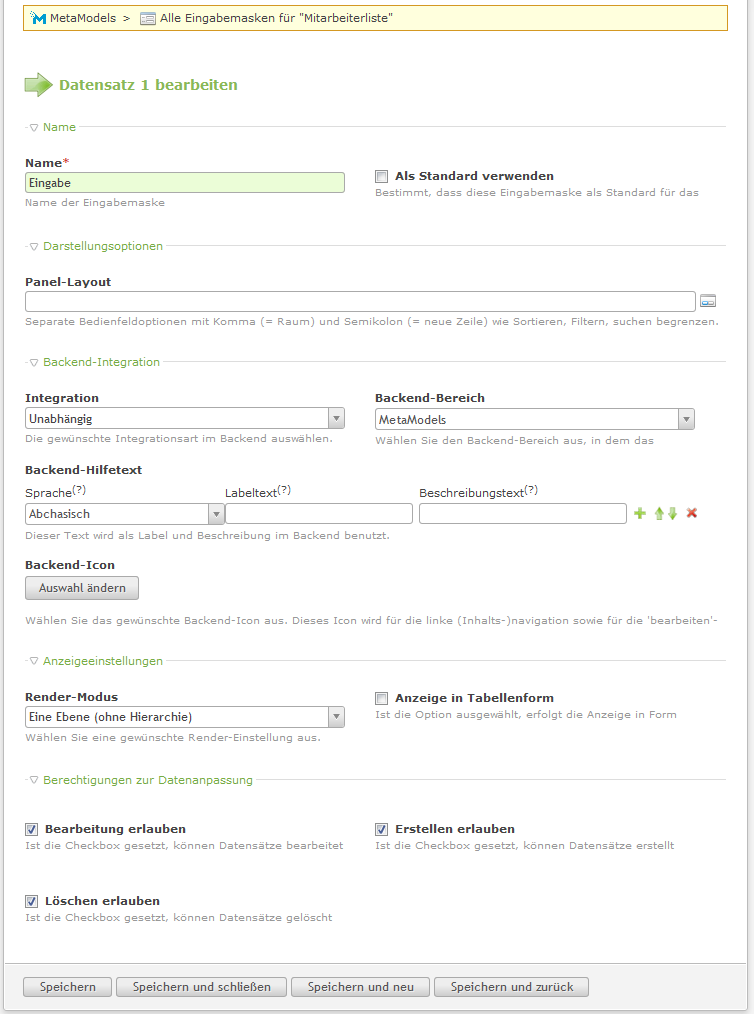
After clicking “ New input mask”, the mask for the input mask settings opens immediately.
In the “Name” input field, enter a name such as “Input”. Another important setting is the
“Integration” selection, where “Independent” should be selected, and in the “Backend section”
dropdown that appears, “MetaModels” should be selected. Additionally, all three checkboxes of the
“Data manipulation permissions” block should be activated — see screenshot. Save the entry with
“Save and close”.
New input mask”, the mask for the input mask settings opens immediately.
In the “Name” input field, enter a name such as “Input”. Another important setting is the
“Integration” selection, where “Independent” should be selected, and in the “Backend section”
dropdown that appears, “MetaModels” should be selected. Additionally, all three checkboxes of the
“Data manipulation permissions” block should be activated — see screenshot. Save the entry with
“Save and close”.
The input masks overview should now show the first entry “Input” — see screenshot.
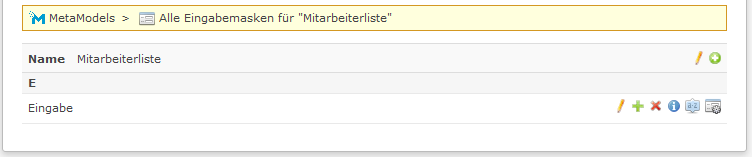
Clicking the icon “ Settings” opens the next level for the attributes. Here,
the attributes to be displayed in the input mask are selected or activated.
Settings” opens the next level for the attributes. Here,
the attributes to be displayed in the input mask are selected or activated.
As with the render settings, the created attributes can be added in one step here too. To do
this, click the header icon “ Add all” and then confirm the “Continue” and “Save
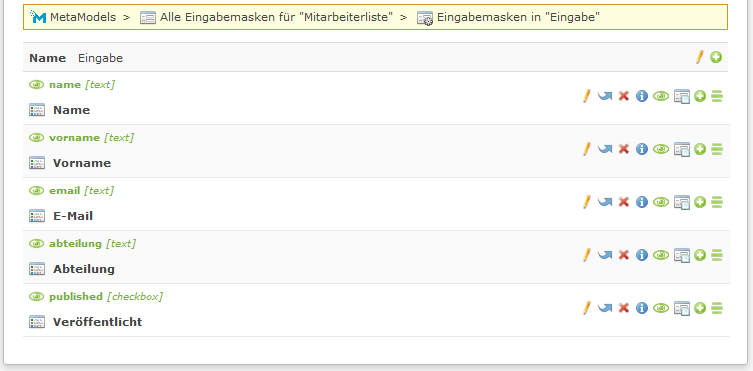
and close” buttons. All existing attributes are now added to the input mask. By default, the
attributes are not activated — this can easily be done via the “eye icon”.
Add all” and then confirm the “Continue” and “Save
and close” buttons. All existing attributes are now added to the input mask. By default, the
attributes are not activated — this can easily be done via the “eye icon”.
In this example, all attributes are activated — the attribute list should now look like the screenshot.
The input mask is still not visible in the backend. This only happens once the Input/Render Assignments step is completed.