Content Elements/Modules for Frontend Output
Once all components for data entry are configured, the data output can be set up. Various options are available for data output — in this example, the output will use the article content element “MetaModel list”.
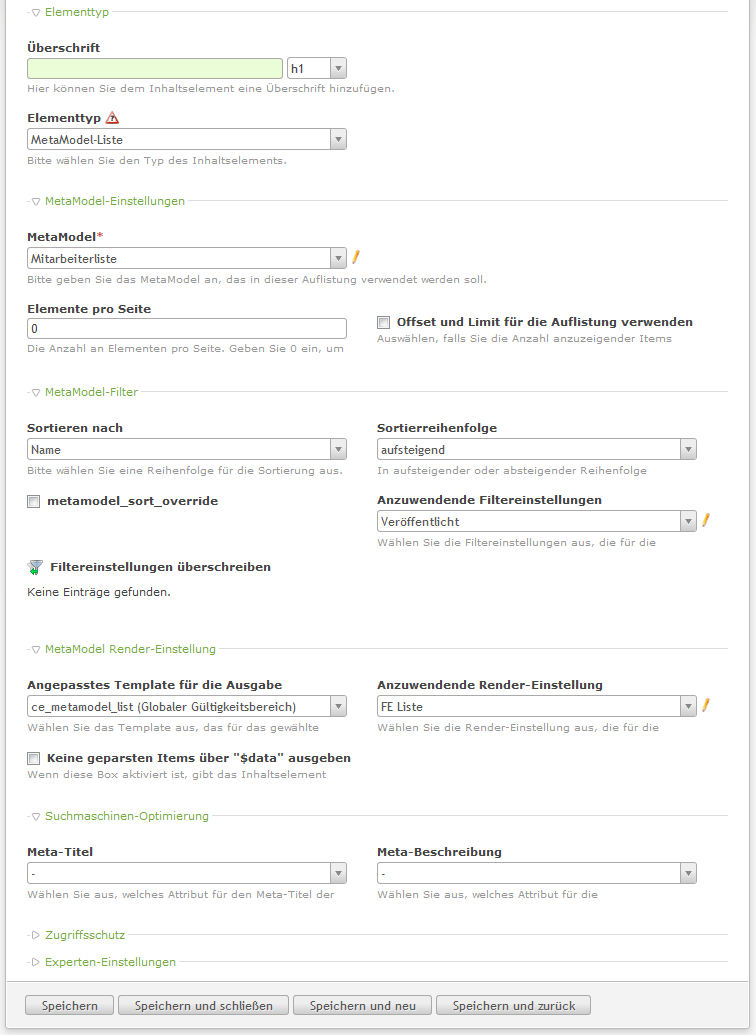
As a preparation for the output, a corresponding page must exist in Contao with an article that contains the content element. A new content element is created with the following settings activated (see screenshot):
Element type: MetaModel list
Sort by: Name
Filter setting to apply: Published
Render setting to apply: FE List
After “Save and close”, the content element is available and the display can be checked in the frontend.
The display should now show the message “Your search returned no results.” since no data has been entered yet.
To test the display, it is necessary to create some records in the employee list. To do this,
click the icon “ Employee List” under “MetaModels” in the left backend
navigation, and then click the icon “
Employee List” under “MetaModels” in the left backend
navigation, and then click the icon “ New record”.
The input mask opens with the predefined fields (attributes), which can be filled with initial data (see screenshot).

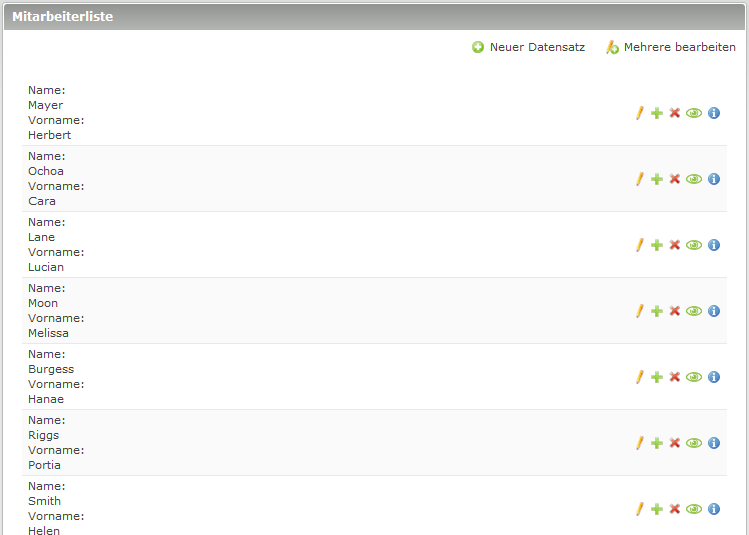
After “Save and close”, the record is visible with the activated attributes from the render setting “BE List” (last name and first name) (see screenshot).

The record can be edited again via the pencil icon, and the “Published” status can be toggled via the “eye” (as an alternative to the checkbox in the input mask).
The frontend output should now look approximately as follows (screenshot).

If some test data is loaded into the database — or entered manually — the employee list in the backend looks approximately as shown in the screenshot:
And in the frontend as follows:
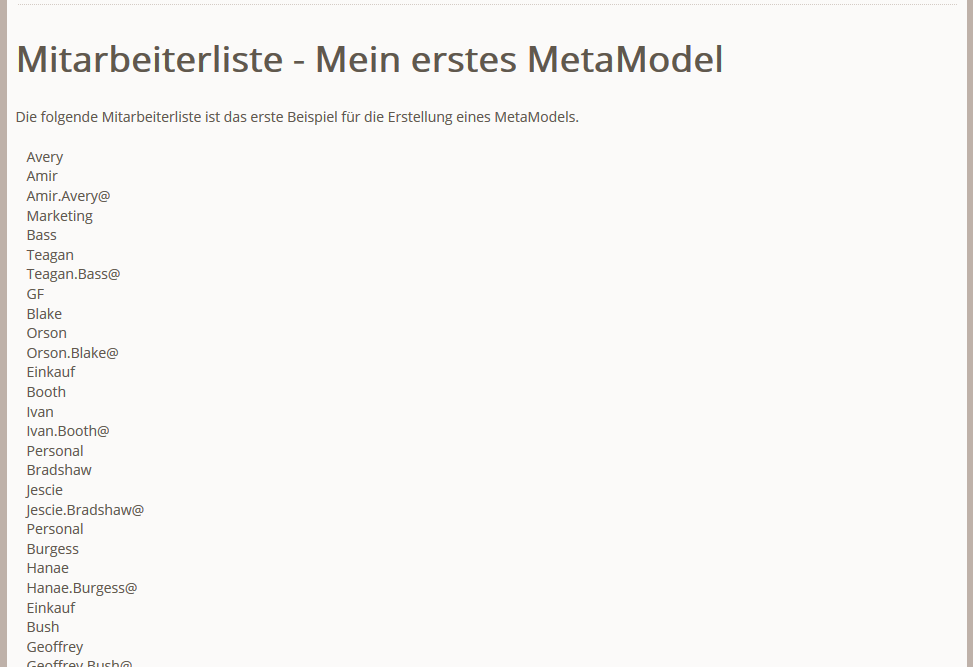
For the frontend output, the attributes are rendered via the default template into individual HTML div containers including specific CSS classes. Formatting can be done either via CSS or by customizing the template so that the output is rendered as an HTML table.
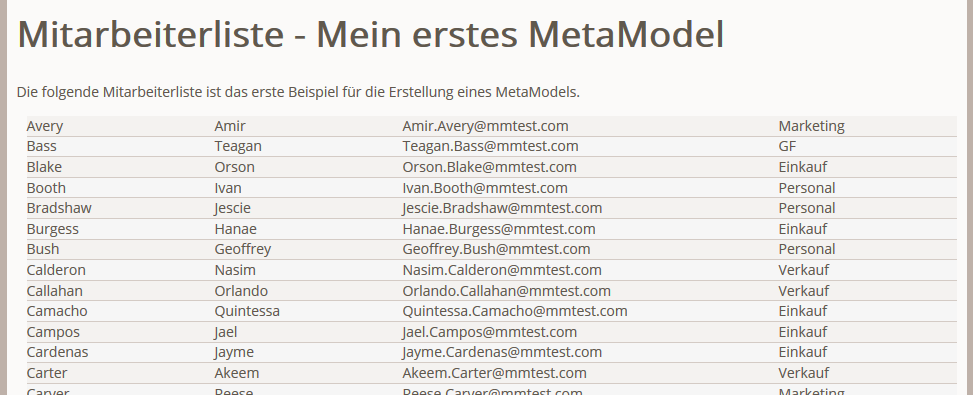
With some CSS rules like the following:
 1     .ce_metamodel_content .item {
 2         display: table;
 3         width: 100%;
 4     }
 5     .ce_metamodel_content .item.even {
 6         background-color: #f4f2f0;
 7         border-bottom: 1px solid #d4cbc5;
 8         border-collapse: collapse;
 9     }
10     .ce_metamodel_content .item.odd {
11         background-color: #f6f6f6;
12         border-bottom: 1px solid #d4cbc5;
13         border-collapse: collapse;
14     }
15     .ce_metamodel_content .item .field {
16         display: table-cell;
17     }
18     .ce_metamodel_content .item .field.name {
19         width: 20%;
20     }
21     .ce_metamodel_content .item .field.firstname {
22         width: 20%;
23     }
24     .ce_metamodel_content .item .field.email {
25         width: 40%;
26     }
27     .ce_metamodel_content .item .field.department {
28         width: 20%;
29     }
the output already looks better — see screenshot:
Detail Page of a Record
Typically, the list view does not display all content of a record, but only those fields needed for searching or selection. The complete record can be presented on a detail page.
For this, a detail page must first be created in Contao — e.g. domain.tld/employee-details.html.
A content element MM list is inserted into this page as a module or CE — MetaModel is again
mm_employees.
A render setting for the output is also needed — for the detail page you should create a separate render setting “FE - Details”. With a custom template, the output can be individually designed.
To ensure only the desired record — and not all records — is output on the page, a corresponding filter is needed. The “Simple lookup” filter rule is recommended, with an alias or translated alias as the attribute. Additional filter rules such as “Published” etc. are also possible as needed. The created filter must be selected in the MM list for the detail page.
With a URL like domain.tld/employee-details/alias/avery-amir.html, the corresponding
record should be output.
To automatically generate links to the detail page in the list view, in the render setting of
the list in the “Jump-to settings” section, the detail page must be selected along with the
corresponding filter. The output of the links in the template is in the actions node.