Icon Picker
If you want to add an icon to records, you can use the File attribute or, when icons are embedded via a font, the corresponding CSS classes. However, selecting icons this way is not very user-friendly.
There are various Contao extensions that provide a dedicated icon picker.
To make this functionality available in MM as well, you could create a custom attribute. Most icon pickers only store strings or serialised arrays, so you can also use the Text attribute with small DCA and template adjustments.
The following presents the adjustments for common picker extensions:
Please observe the respective licence terms for the icons and fonts!
Prerequisites
First, a Text attribute must be created, including migration and integration in the input mask and render settings.
For DCA adjustments, a PHP file contao/dca/mm_employees.php must be created.
If “LABEL NOT SET” appears instead of the label,
please fix it as described.
The DCA adjustment can be taken from the respective examples — adapt the
MetaModel name (mm_employees) and the attribute column name *_icon
(e.g. rst_icon).
For the output, custom templates — derived from mm_attr_text — must be
created and selected in the render settings for the attribute. Additional CSS
settings for size or colour can also be stored there.
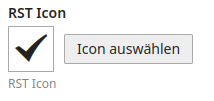
RockSolid Icon Picker
The extension works with its own icon font — the SVG files can be converted with the SVG Font Generator and custom SVG icons can also be added. Users of an RST theme will find the ready-made font files in the corresponding theme package.
DCA adjustment:
1<?php
2// contao/dca/mm_employees.php
3$GLOBALS['TL_DCA']['mm_employees']['fields']['rst_icon']['inputType']        = 'rocksolid_icon_picker';
4$GLOBALS['TL_DCA']['mm_employees']['fields']['rst_icon']['eval']['iconFont'] = '/files/themes/iconfont/rocksolid-icons.svg';
Template:
1<?php
2// templates/mm_attr_text_rst_icon.html5
3<span class="<?= $this->additional_class ?>" data-icon="&#x<?= $this->raw ?>;"></span>
CSS:
 1/* files/themes/css/icons.css */
 2/* Icon font */
 3@font-face {
 4  font-family: "RockSolid Icons";
 5  src: url("../iconfont/rocksolid-icons.woff2") format("woff2"), url("../iconfont/rocksolid-icons.svg") format("svg");
 6  font-weight: normal;
 7  font-style: normal;
 8}
 9
10/* Icon attribute */
11*[data-icon]:before,
12*[class^="icon-"]:before,
13*[class*=" icon-"]:before {
14  font: 100%/1 "RockSolid Icons";
15  -webkit-font-smoothing: antialiased;
16  font-smoothing: antialiased;
17  text-rendering: geometricPrecision;
18  text-indent: 0;
19  display: inline-block;
20  position: relative;
21  margin-right: 0.26667em;
22}
23*[data-icon]:before {
24  content: attr(data-icon);
25}
26*[data-icon].after:before {
27  content: none;
28}
29*[data-icon].after:after {
30  font: 100%/1 "RockSolid Icons";
31  content: attr(data-icon);
32  -webkit-font-smoothing: antialiased;
33  font-smoothing: antialiased;
34  text-rendering: geometricPrecision;
35  text-indent: 0;
36  display: inline-block;
37  position: relative;
38  margin-left: 0.26667em;
39}
Output BE & FE:

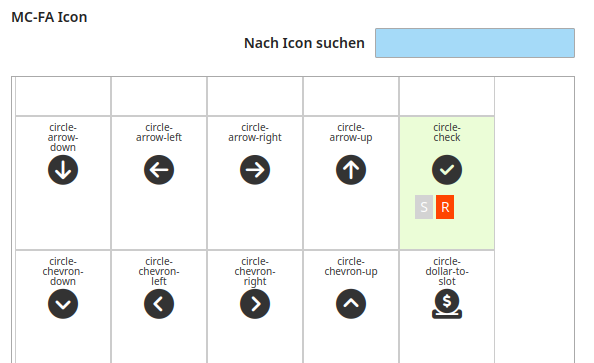
Marco Cupic Font Awesome Icon Picker
From version 7, no entries in config.yaml are required for the widget —
however, the icon data is fetched directly from the Fontawesome server. If you
do not want this, you can also embed the files directly on the web server. To do
this, download the icon package from the website
and unzip it. The folders js/, metadata/ and webfonts/ must be placed
on the web server in a suitable folder under files/.
The configuration then looks like this, for example:
1# config/config.yaml
2markocupic_fontawesome_icon_picker:
3  fontawesome_source_path: 'files/themes/fa7_icons/js/all.min.js'
4  fontawesome_allowed_styles:
5    - fa-regular
6    - fa-solid
7    - fa-brands
8  fontawesome_meta_file_path: 'files/themes/fa7_icons/metadata/icons.yml'
Depending on the configuration of fontawesome_allowed_styles and the
available icons, the labels R Regular, S Solid, B Brands, etc. are available as
selection buttons — the order determines the icon style displayed in the widget.
Users of an FA Pro variant should refer to the Readme.
For both variants, note that the icon fonts for the frontend must be embedded separately via CSS.
DCA adjustment:
1<?php
2// contao/dca/mm_employees.php
3$GLOBALS['TL_DCA']['mm_employees']['fields']['mcfa_icon']['inputType'] = 'fontawesomeIconPicker';
Template:
Since storage is done as a serialised array, both the html5 and text
templates must be created.
 1<?php
 2// templates/mm_attr_text_mcfa_icon.html5
 3/** After deserialisation, an array with three entries is available, e.g.
 4* Array
 5* (
 6*     [0] => circle-check
 7*     [1] => fa-regular
 8*     [2] => f058
 9* )
10*/
11
12$mcfaData = \Contao\StringUtil::deserialize($this->raw, true);
13?>
14<i class="<?= $mcfaData[1] ?? '' ?> fa-<?= $mcfaData[0] ?? '' ?><?= $this->additional_class ?>"></i>
1<?php
2// templates/mm_attr_text_mcfa_icon.text
3<?php
4$mcfaData = \Contao\StringUtil::deserialize($this->raw, true);
5?>
6<?= $mcfaData[1] ?? '' ?> fa-<?= $mcfaData[0] ?? '' ?>
Output BE & FE:
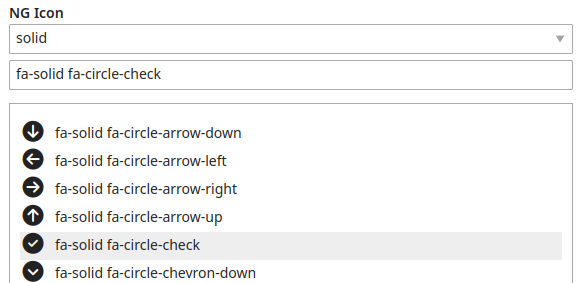
NetGroup IconToolkit
The extension is designed for Font Awesome and ships with version 7.1. It is also possible to load custom icon fonts or a more recent icon set. A frontend module is provided for embedding the font.
DCA adjustment:
1<?php
2// contao/dca/mm_employees.php
3use NetGroup\IconToolkit\Classes\Contao\Widgets\IconPickerWidget;
4
5$GLOBALS['TL_DCA']['mm_employees']['fields']['ng_icon']['inputType'] = IconPickerWidget::TYPE;
Template:
1<?php
2// templates/mm_attr_text_ng_icon.html5
3<i class="<?= $this->raw ?><?= $this->additional_class ?>"></i>
CSS:
1/* classes 'fa-2x fa-green' in render settings */
2.fa-green {
3  color: #6bb710;
4}
Output BE & FE:

Lukas Bableck SVG Icon-Picker
The extension is designed for Font Awesome — but it is also possible to load custom SVG icons such as Lucide or Bootstrap.
The icons are output as “real” SVGs, which allows customisation of colours, etc.
DCA adjustment:
1<?php
2// contao/dca/mm_employees.php
3$GLOBALS['TL_DCA']['mm_employees']['fields']['lbsvg_icon']['inputType']                 = 'svgIconPicker';
4$GLOBALS['TL_DCA']['mm_employees']['fields']['lbsvg_icon']['eval']['sourceDirectory']   = '/files/themes/svg-icons/svgs-full/regular';
5$GLOBALS['TL_DCA']['mm_employees']['fields']['lbsvg_icon']['eval']['metadataDirectory'] = '/files/themes/svg-icons/metadata';
Template:
 1<?php
 2// templates/mm_attr_text_lbsvg_icon.html5
 3use Contao\System;
 4use Lukasbableck\ContaoSVGIconPickerBundle\Twig\Extension;
 5
 6$rootDir = System::getContainer()->getParameter('kernel.project_dir');
 7$svgTool = new Extension($rootDir);
 8
 9$svg = \str_replace('class="', 'class="' . \trim($this->additional_class) . ' ', $svgTool->renderSVG($this->raw));
10?>
11
12<?= $svg ?>
CSS:
1/* classes 'lbsvg_icon lbsvg_green' in render settings */
2svg.lbsvg_icon {
3  width: 33px;
4  height: 33px;
5}
6
7svg.lbsvg_green {
8  color: #6bb710;
9}
Output BE & FE:
Notes on Font Awesome
The Font Awesome icon pack can be downloaded from the
website. The “Free” variant includes
Regular, Solid, and Brands. If you want to use the SVG icons, it is recommended
to use the svg-full/ folder — all icons here are square with a corresponding
border.
If Font Awesome CSS is also output in the frontend as with NG IconToolkit, the
corresponding styling classes such as fa-2x for double size can be specified
in the render settings. An overview of these options can be found in the
FA documentation.
Notes on Lucide Icons
From version 5.5, Contao uses icons from the Lucide package in the backend. To use these in the frontend as well, the easiest approach is the SVG Icon-Picker extension.
The entire package can be downloaded from Github via
“Code > Download ZIP”
and unzipped. The icons/ folder contains all SVG icons and must be placed on
the web server in a suitable folder under files.
The folder must then be specified in the configuration — e.g.
1<?php
2// contao/dca/mm_employees.php
3$GLOBALS['TL_DCA']['mm_employees']['fields']['lbsvg_icon']['inputType']                 = 'svgIconPicker';
4$GLOBALS['TL_DCA']['mm_employees']['fields']['lbsvg_icon']['eval']['sourceDirectory']   = '/files/themes/lucide-icons';
5//$GLOBALS['TL_DCA']['mm_employees']['fields']['lbsvg_icon']['eval']['metadataDirectory'] = '/files/themes/svg-icons/metadata';
Lucide does not provide the icons automatically as a font. However, the files can be converted to a font. The SVG files must first be converted from strokes to fills — e.g. using the Iconly tool “Convert SVG Strokes to Fills” or the npm package “svg-outline-stroke”. The Lucide icon font can then be generated with IcoMoon or the npm package “fantasticon”.
Notes on Bootstrap Icons
Bootstrap 5 includes its own icon package with SVG files and a font as woff and woff2.
The package can be downloaded from the
Bootstrap website, unzipped and
placed in a suitable folder under files.
For using the SVG files, the SVG Icon-Picker extension
can be used — adjust the path for sourceDirectory in the DCA configuration
accordingly.
If you prefer font output <https://icons.getbootstrap.com/#icon-font> in the frontend, when using the SVG Icon-Picker extension you can use the SVG icons for backend selection and adjust the template for the frontend — e.g.
1// templates/mm_attr_text_lbsvg_bs5_icon.html5
2<i class="bi bi-<?= basename($this->raw, '.svg') ?><?= $this->additional_class ?>"></i>
Additionally, the BS CSS bootstrap-icons.min.css must be included for the
frontend — the file is included in the download package.
Icon styling can be adjusted e.g. with the “text-*” classes or “fs-*” classes; the classes can be entered in the render settings for the attribute. For this, the standard Bootstrap CSS must also be included.